> ## Documentation Index
> Fetch the complete documentation index at: https://docs.ditto.live/llms.txt
> Use this file to discover all available pages before exploring further.
# Role-Based Access Control
> Control access to your Ditto database in the portal with role-based access control (RBAC).
## Overview of RBAC
The Ditto portal provides the ability to create, modify, and delete custom roles, allowing you to set fine-grained read-write access controls to database data.
With this you can define organization hierarchies for permissions delegation, set permissions for portal functionality like viewing collections, querying tokens, transferring databases between organizations, and more.
### Organization Permissions Settings
When configuring access control for roles within an organization, there are various types of privileges you can choose from.
These can be accessed from the role editor, available under **Settings** > **Roles**.
The following table provides an overview of the various settings you can configure for roles within an organization.
Some permissions have dependencies on others.
For example, a role with **Accept incoming database transfer requests** permission will also have **View incoming database transfer requests**.
Where this applies, these dependent roles will be selected automatically for you when selecting in the role editor.
| **Setting** | **Description** |
| ---------------------------------------------- | --------------------------------------------------------------------------------------- |
| **Accept incoming database transfer requests** | Initiate, approve, or cancel requests to transfer databases between organizations |
| **Access audit logs** | Review audit logs |
| **Create a database** | Set up new databases |
| **Manage organization members** | Oversee and administer the membership of an organization |
| **View organization details** | Access and view details related to the organization |
| **View incoming database transfer requests** | See requests from other organizations to transfer databases into the organization |
| **Reject incoming database transfer requests** | Decline requests from other organizations to transfer databases to the organization |
| **Update the organization details** | Modify information related to the organization |
| **View access grants** | Review the permissions granted to specific users, roles, or organizations |
| **Manage access grants** | Control and administer access privileges granted to other roles within the organization |
## Database Permissions Settings
Following is an overview of the various settings that, once assigned, grant end users the ability to manage the database. (See [Creating Roles](/cloud/portal/role-based-access-control#creating-new-roles))
| **Setting** | **Description** |
| ----------------------------------------------------- | --------------------------------------------------------------------------------------------- |
| **Access database data** | Access mesh-generated transactional data |
| **Modify database data** | Make changes to mesh-generated transactional data |
| **Access database data bridges** | Access CDC Data Bridges and their connection info |
| **Manage database data bridges** | Create, update and delete CDC Data Bridges |
| **Cancel a request for a database transfer** | Withdraw active requests to transfer databases to other organizations |
| **Request offline-only licenses** | Manage the licenses designating database for offline usage |
| **Delete a database** | Permanently remove database |
| **Create API keys** | Generate unique identifiers used for authentication and authorization access to database data |
| **Delete API keys** | Revoke authentication and authorization to access to database data |
| **View database metrics** | Review various analytics associated with apps |
| **View database details** | Access and review specific information and settings associated with apps |
| **Access API keys** | View the API keys used for authentication and authorization to access database data |
| **Access offline-only licenses** | View the licenses designating database for offline usage |
| **Initiate a request for the transfer of a database** | Transfer ownership of database to other organizations |
| **Update database details** | Modify the information and settings associated with databases |
| **Access a MongoDB connector** | Access the MongoDB connector configuration |
| **Manage a MongoDB connector** | Make changes to the MongoDB connector configuration |
### Offline License Token Permissions
The **Database Permissions Settings** table above includes two permissions related to offline license tokens:
* **Access offline-only licenses** — Grants visibility to the offline license token section on the **Connect** tab of a database. Users without this permission will not see offline license tokens in the Portal at all.
* **Request offline-only licenses** — Allows creating and managing offline license tokens. This permission depends on **Access offline-only licenses** (both are required to create tokens).
If you need offline license tokens but lack the required permissions, ask your organization admin to assign a role with these permissions, or contact [Ditto support](https://docs.ditto.live/support) to have tokens generated for you. For more on obtaining tokens, see [Getting SDK Connection Details](/cloud/portal/getting-sdk-connection-details).
## Organization Roles
To establish role-based access controls for your organization:
Create new roles with the desired settings. ([Creating New Roles](/cloud/portal/role-based-access-control#creating-new-roles))
Designate roles for the appropriate end users within your organization. ([Assigning Roles to End Users](/cloud/portal/role-based-access-control#assigning-roles-to-end-users))
### Creating New Roles
To add a new role to your organization:
From your organization, click **Settings**.
Click **Roles**.
Click **Add new role**.
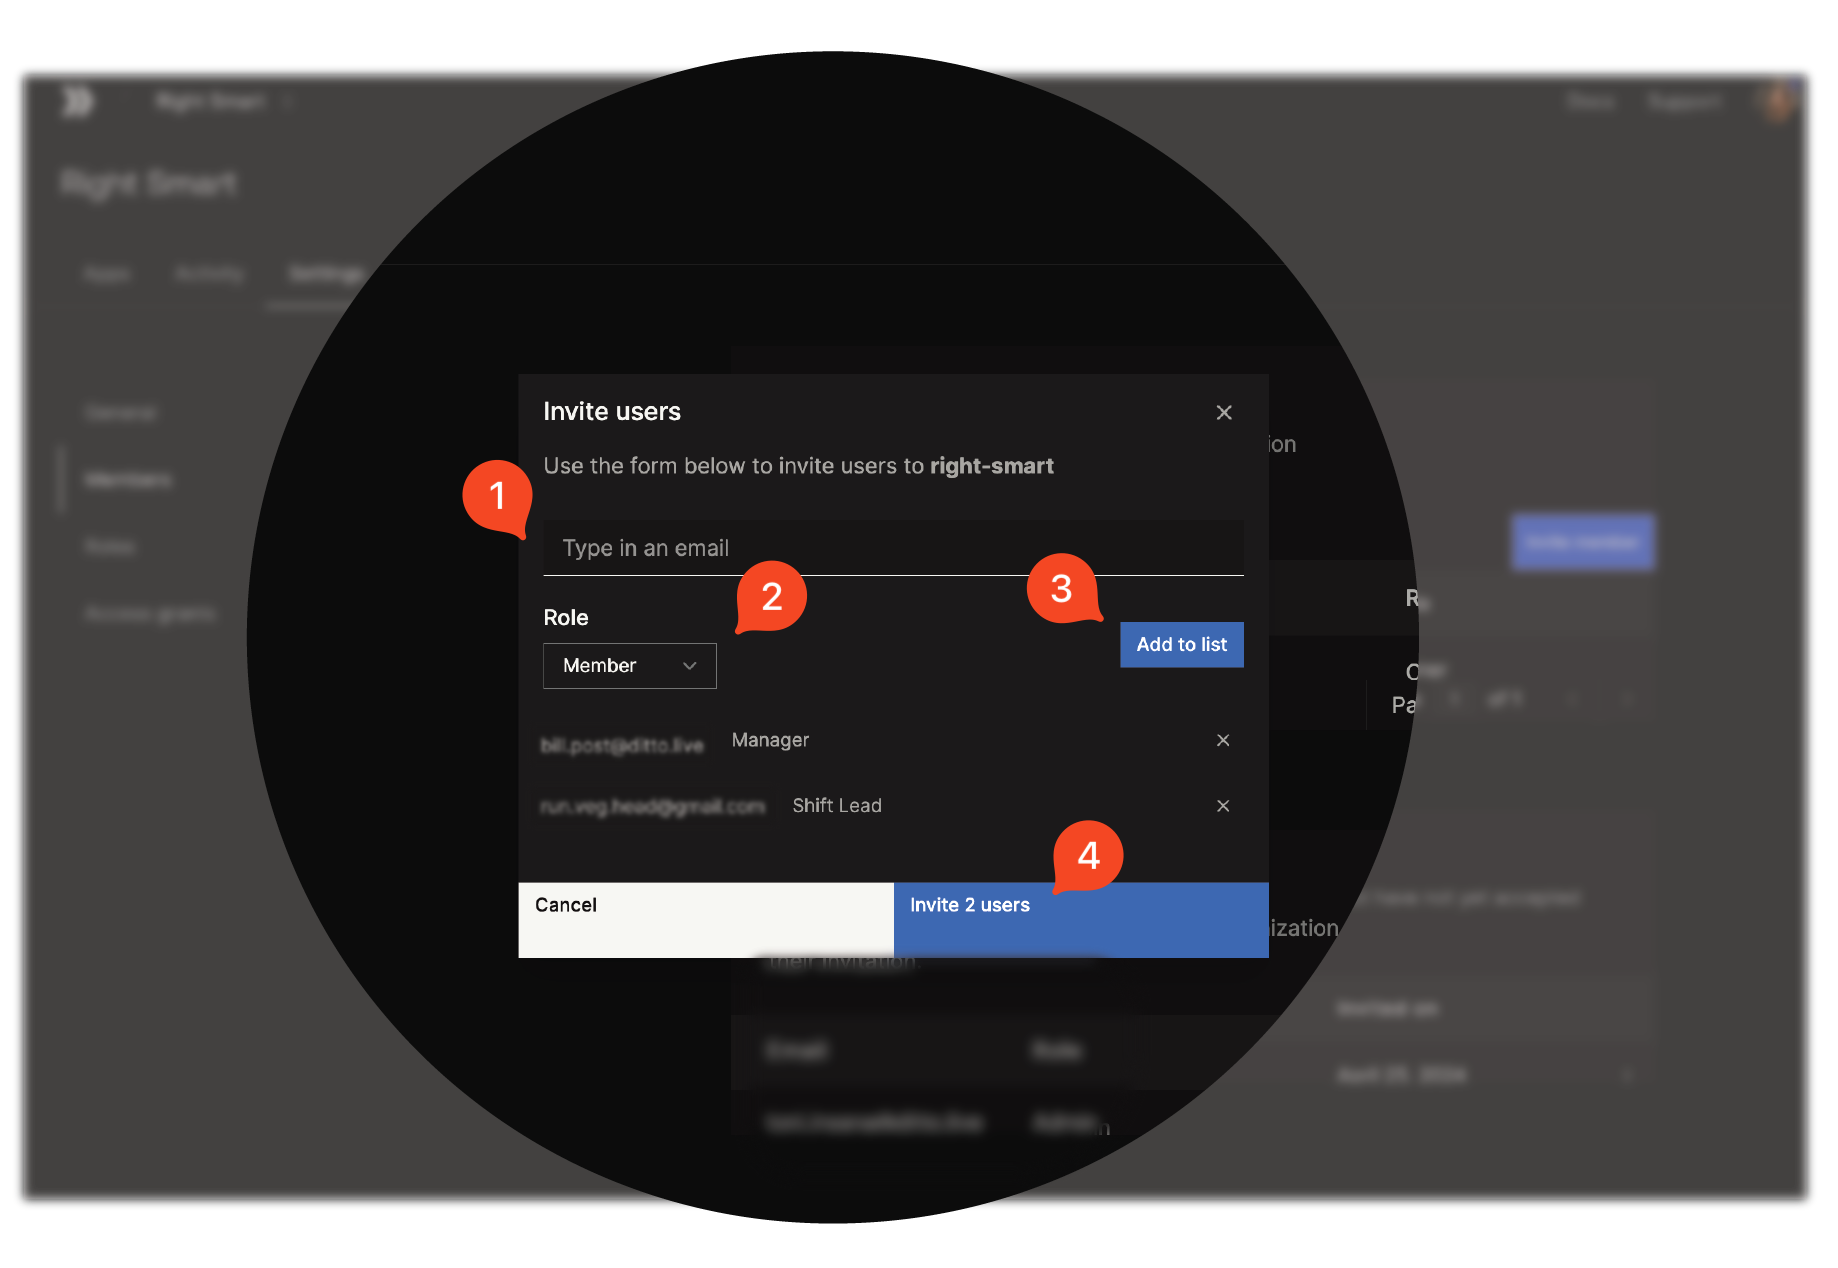 Click to select and deselect the settings you want to apply to your new role as desired, and then click **Create role**.
For organization members to regain read-write access to database data, enable **Access adatabase data** and **Modify database data** in the \*\*Database permissions \*\*as shown in the following graphic.
Once you've created your role with read-write access permissions, make sure to assign the role to your members as appropriate. ([Assigning Roles](/cloud/portal/role-based-access-control#assigning-roles-to-end-users))
### Assigning Roles to End Users
Once you've created a role, designate them to the appropriate end users within your organization:
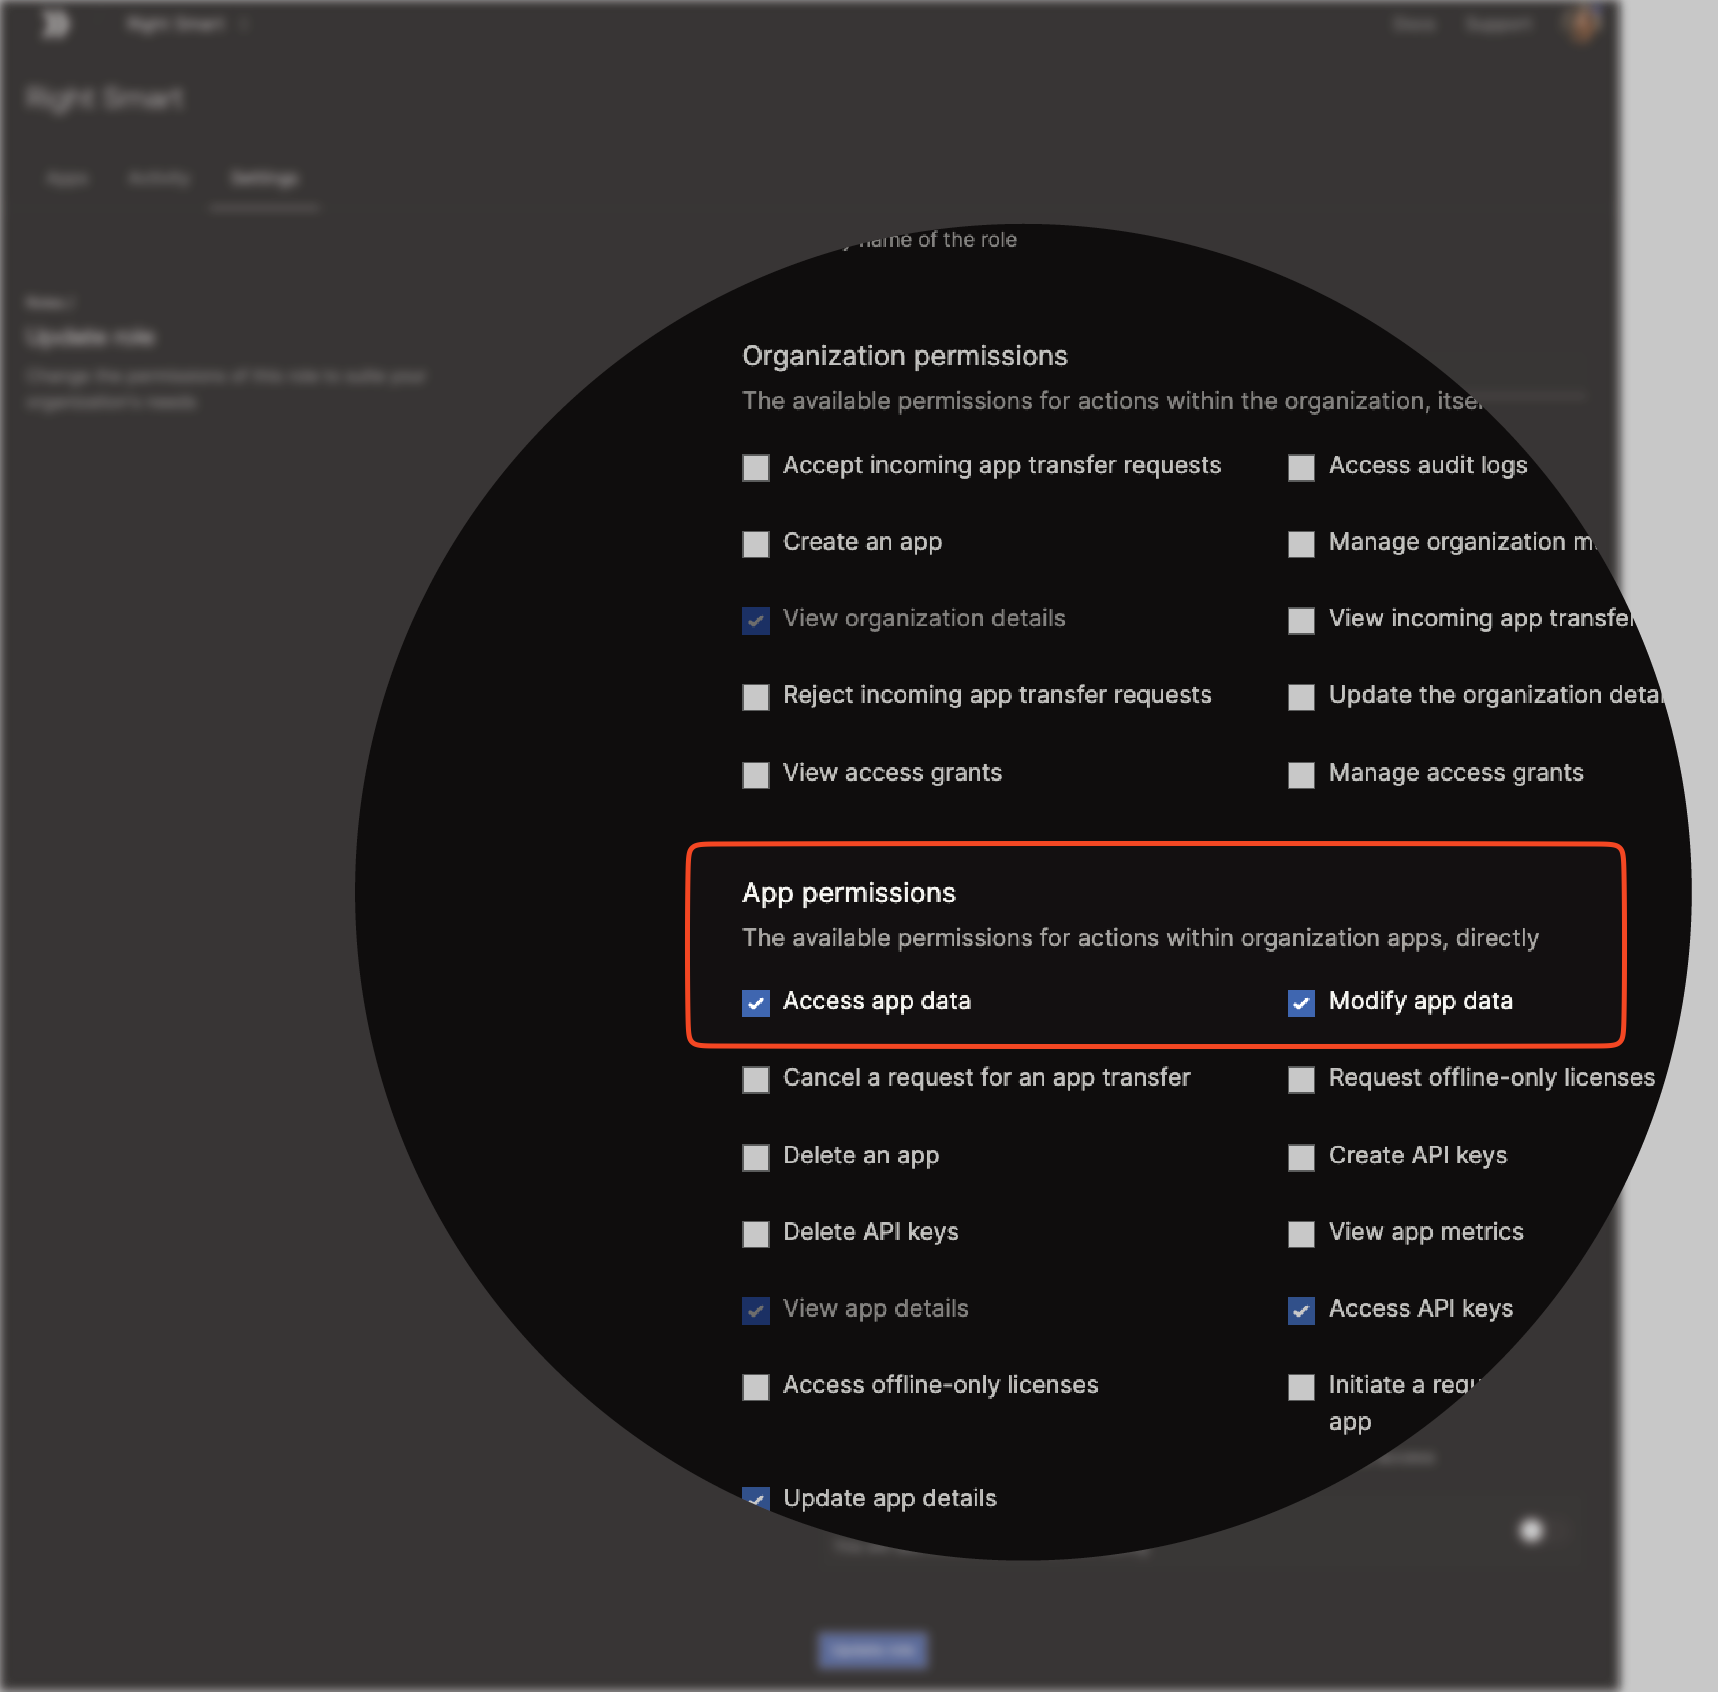
From **Settings** > **Members**, click **Invite member** located on the right.
Click to select and deselect the settings you want to apply to your new role as desired, and then click **Create role**.
For organization members to regain read-write access to database data, enable **Access adatabase data** and **Modify database data** in the \*\*Database permissions \*\*as shown in the following graphic.
Once you've created your role with read-write access permissions, make sure to assign the role to your members as appropriate. ([Assigning Roles](/cloud/portal/role-based-access-control#assigning-roles-to-end-users))
### Assigning Roles to End Users
Once you've created a role, designate them to the appropriate end users within your organization:
From **Settings** > **Members**, click **Invite member** located on the right.
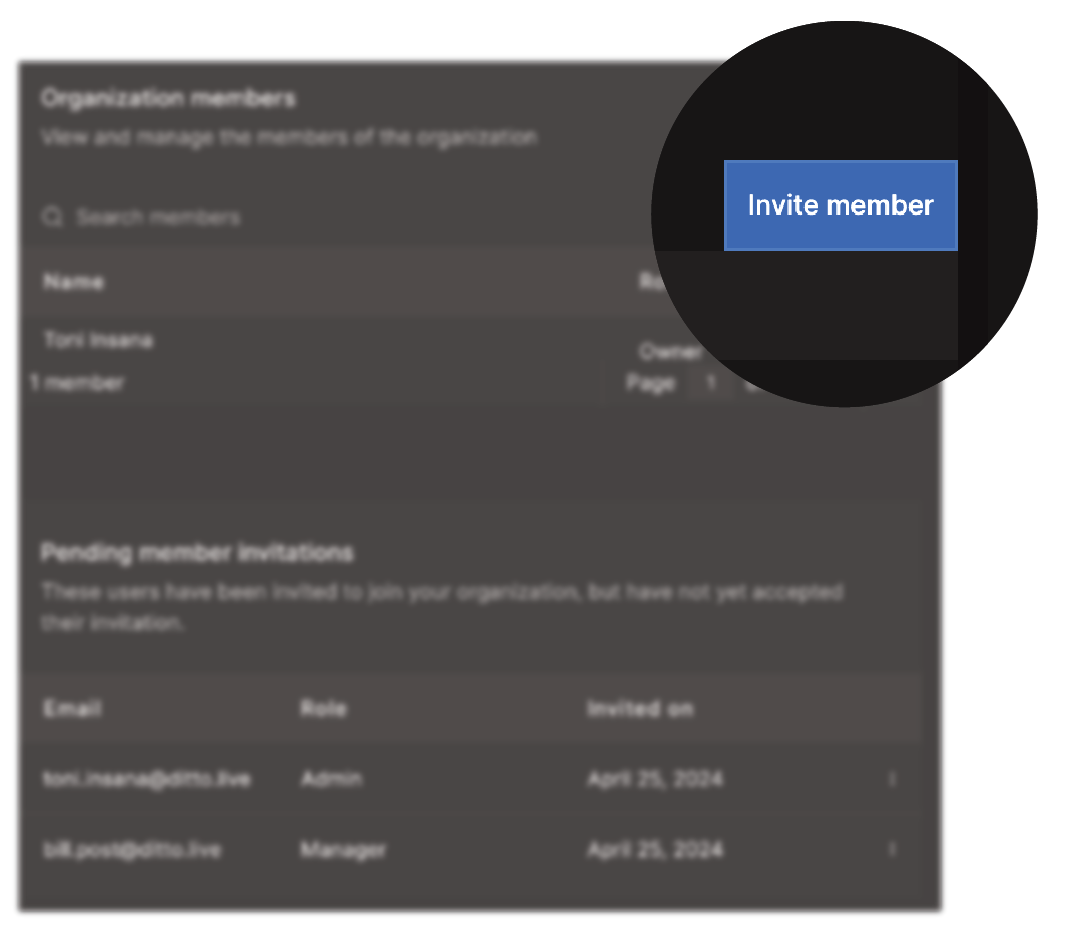 From the **Invite users** modal that appears:
1. Enter the email belonging to the end user you want to add.
2. Click **Role** and select the role type you want to assign.
3. Click **Add to list**.
4. When finished adding end users to the invite, click **Invite users**.
From the **Invite users** modal that appears:
1. Enter the email belonging to the end user you want to add.
2. Click **Role** and select the role type you want to assign.
3. Click **Add to list**.
4. When finished adding end users to the invite, click **Invite users**.
 #### Viewing Pending Member Invitations
Once a member is assigned a role, Ditto automatically sends a formal invitation to the email address specified in the invite, which must be accepted before RBAC privileges take effect.
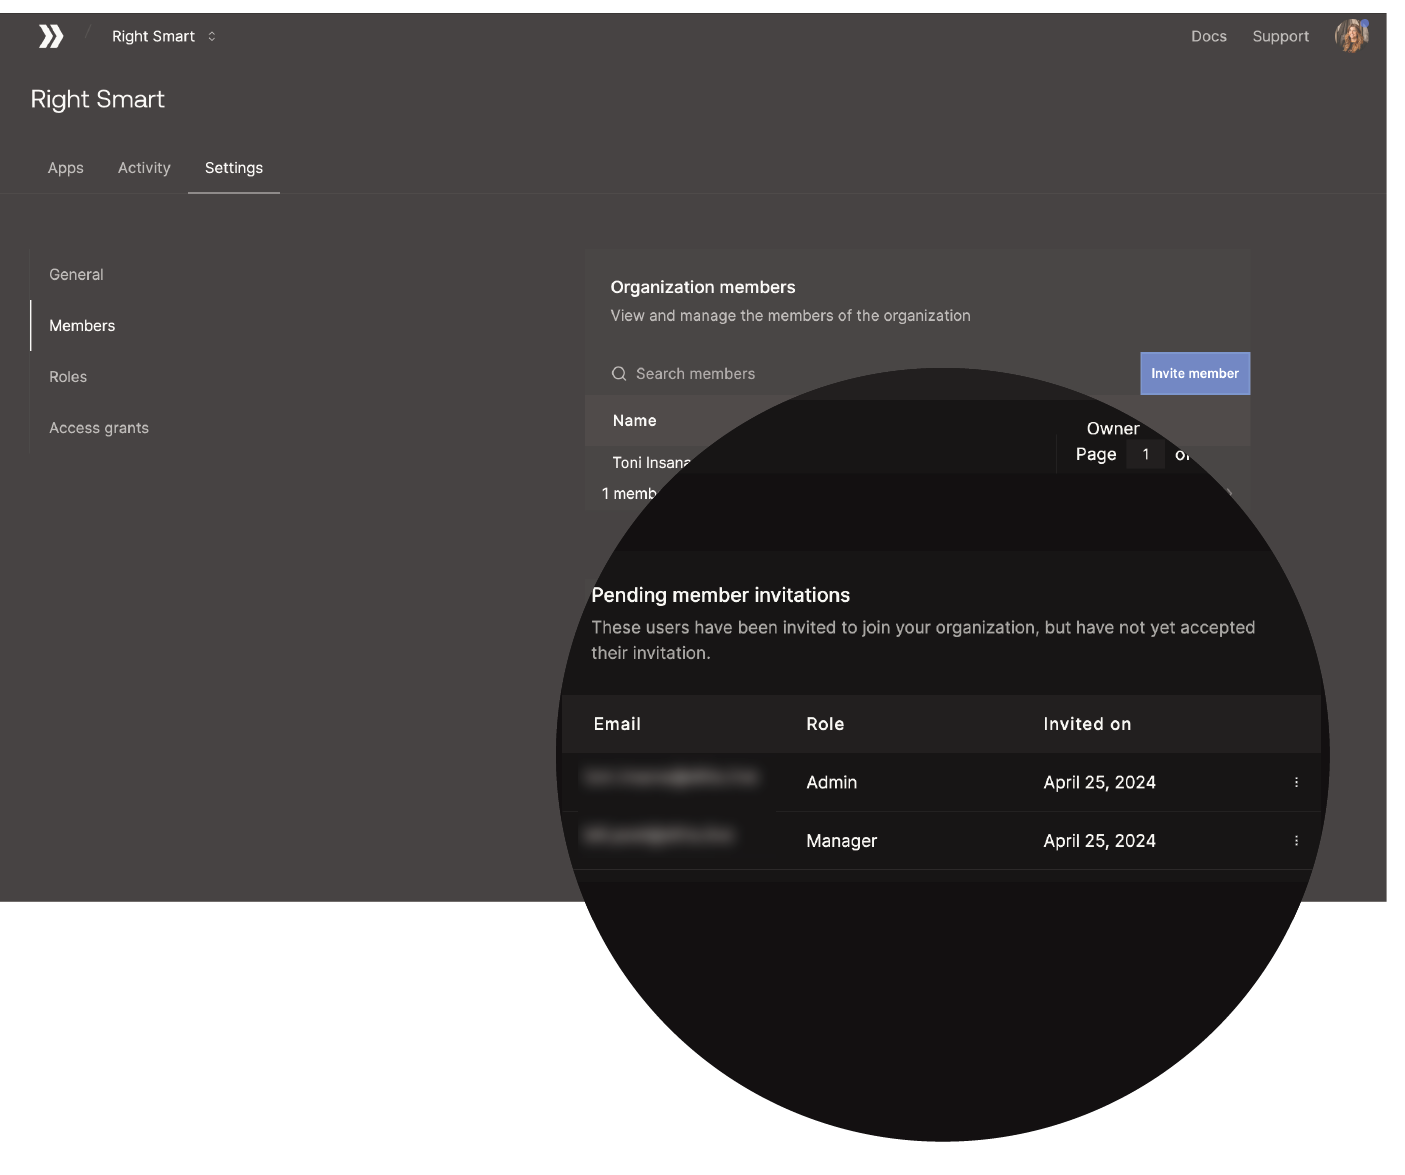
To view a list of invitations waiting for approval, go to **Settings **>** Members** in the portal. A complete list of invitations display within **Pending member invitations**, as shown in the following graphic:
#### Viewing Pending Member Invitations
Once a member is assigned a role, Ditto automatically sends a formal invitation to the email address specified in the invite, which must be accepted before RBAC privileges take effect.
To view a list of invitations waiting for approval, go to **Settings **>** Members** in the portal. A complete list of invitations display within **Pending member invitations**, as shown in the following graphic:
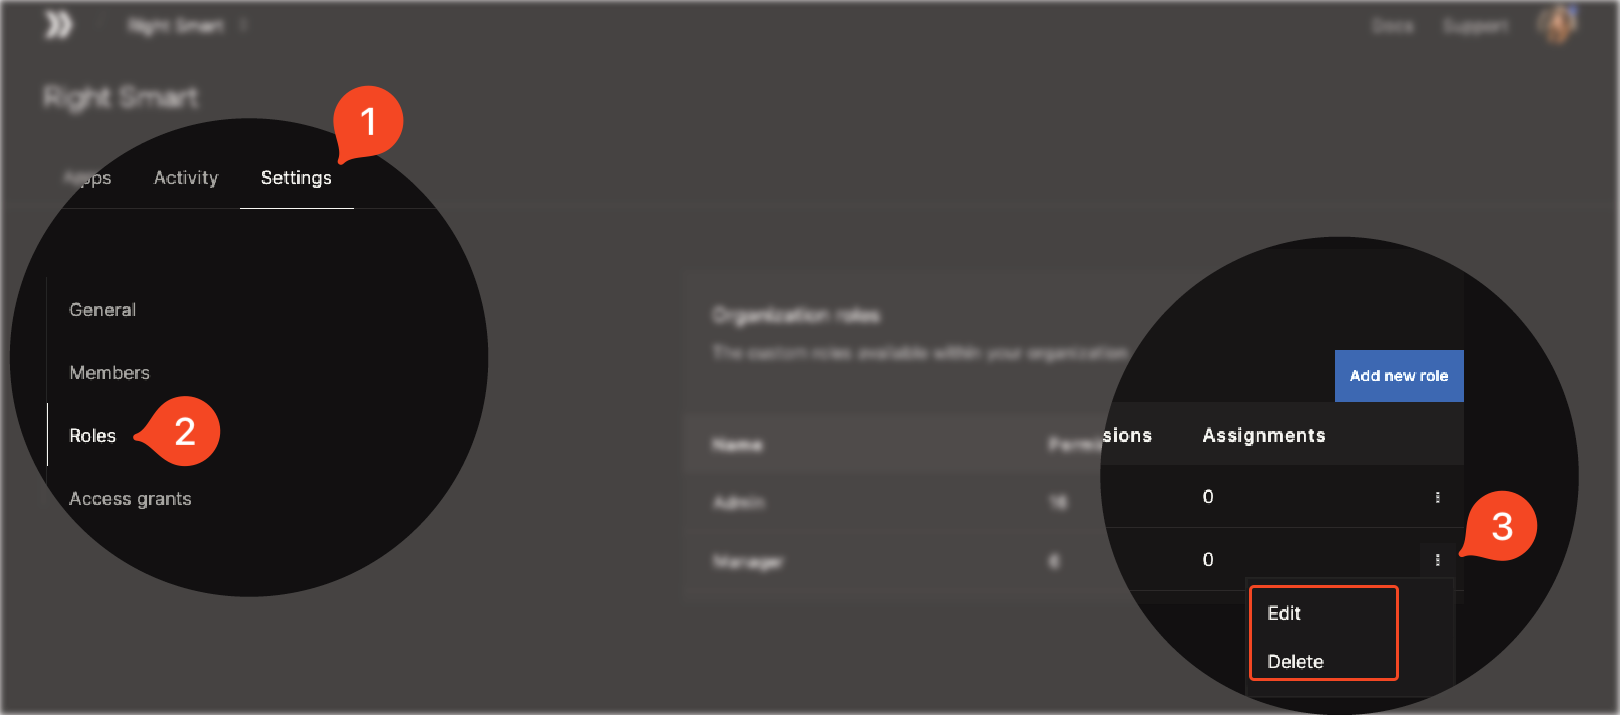
 ### Modifying and Deleting Roles
To edit a role's settings or permanently remove a role from your organization:
From your organization, click **Settings**.
Click **Roles**.
Click the three-dot menu next to the role you want to modify or delete:
* To modify, select **Edit**.
* To permanently remove, select **Delete**.
### Modifying and Deleting Roles
To edit a role's settings or permanently remove a role from your organization:
From your organization, click **Settings**.
Click **Roles**.
Click the three-dot menu next to the role you want to modify or delete:
* To modify, select **Edit**.
* To permanently remove, select **Delete**.
 ## Ditto Employee Access Grants
There are circumstances in which Ditto's support team requires elevated privileges to access your database data, for instance, to troubleshoot an issue.
Ditto employees can only access your database data with an approved *access grant*. An access grant is a formal authorization provided by any of the following to approve the access request initiated by Ditto:
* Current organization owner
* Organization roles configured with\*\* Manage access grants\*\* privileges
Once accepted, you can revoke access grants at any time. (See [Revoking Access](/cloud/portal/role-based-access-control#revoking-access))
For more information, see [Organization Permissions Settings](/cloud/portal/role-based-access-control#organization-permissions-settings) and [Accepting Access Grants](/cloud/portal/role-based-access-control#granting-access).
### Granting Access
To approve a Ditto-initiated access grant:
Click **Database**.
From **Access grants**, click **Accept**.
## Ditto Employee Access Grants
There are circumstances in which Ditto's support team requires elevated privileges to access your database data, for instance, to troubleshoot an issue.
Ditto employees can only access your database data with an approved *access grant*. An access grant is a formal authorization provided by any of the following to approve the access request initiated by Ditto:
* Current organization owner
* Organization roles configured with\*\* Manage access grants\*\* privileges
Once accepted, you can revoke access grants at any time. (See [Revoking Access](/cloud/portal/role-based-access-control#revoking-access))
For more information, see [Organization Permissions Settings](/cloud/portal/role-based-access-control#organization-permissions-settings) and [Accepting Access Grants](/cloud/portal/role-based-access-control#granting-access).
### Granting Access
To approve a Ditto-initiated access grant:
Click **Database**.
From **Access grants**, click **Accept**.
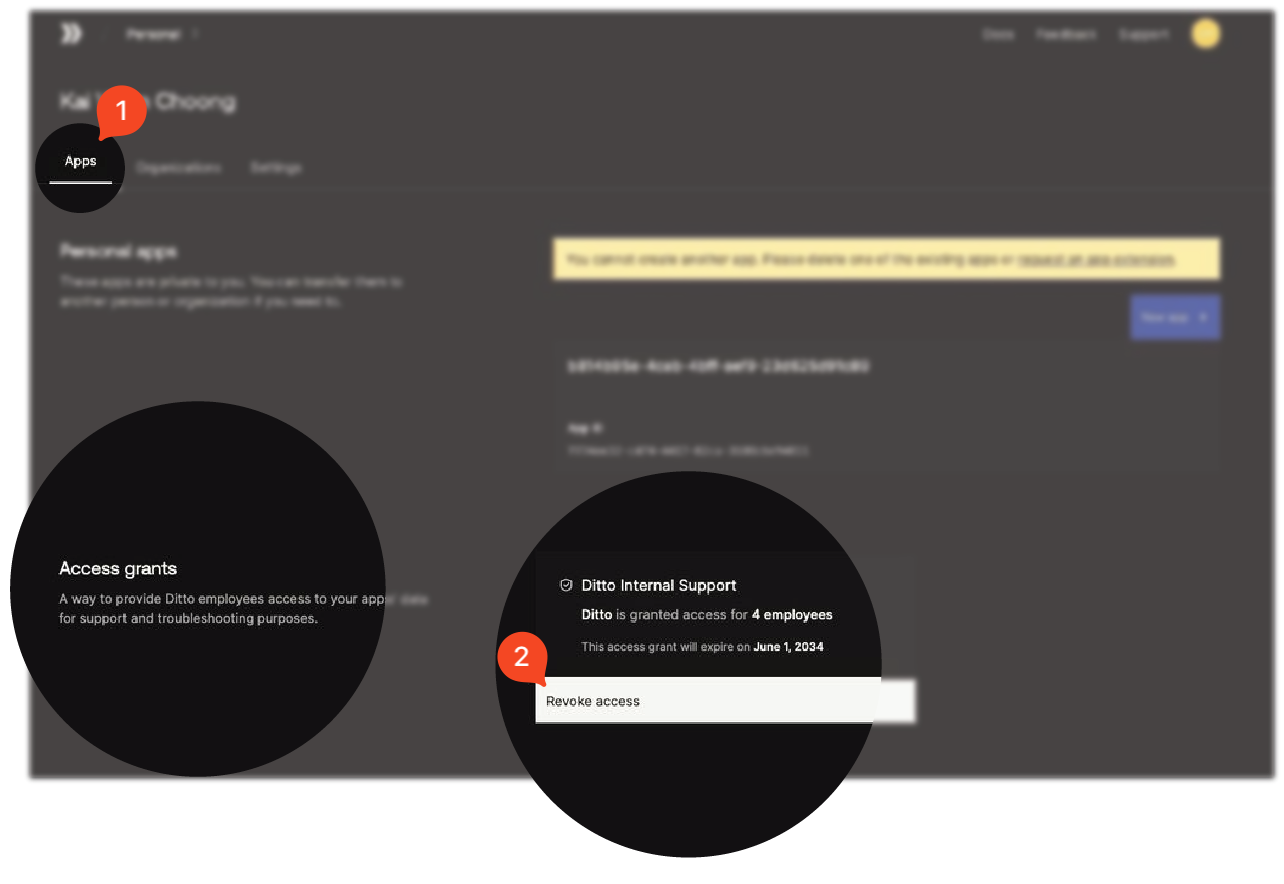 ### Revoking Access
Once an access grant is approved, you can end access at any time:
Click **Database**.
From **Access grants**, click **Revoke access**.
### Revoking Access
Once an access grant is approved, you can end access at any time:
Click **Database**.
From **Access grants**, click **Revoke access**.