Accessing the DQL Editor
To access the DQL Editor, log in to the portal > select your database > click Collections > and then click DQL editor button located on the right. Note that clicking the View link on any collection will automatically open the DQL Editor with that collection selected.DQL Editor Interface Overview
The following illustration and corresponding table provide a basic overview of the DQL Editor: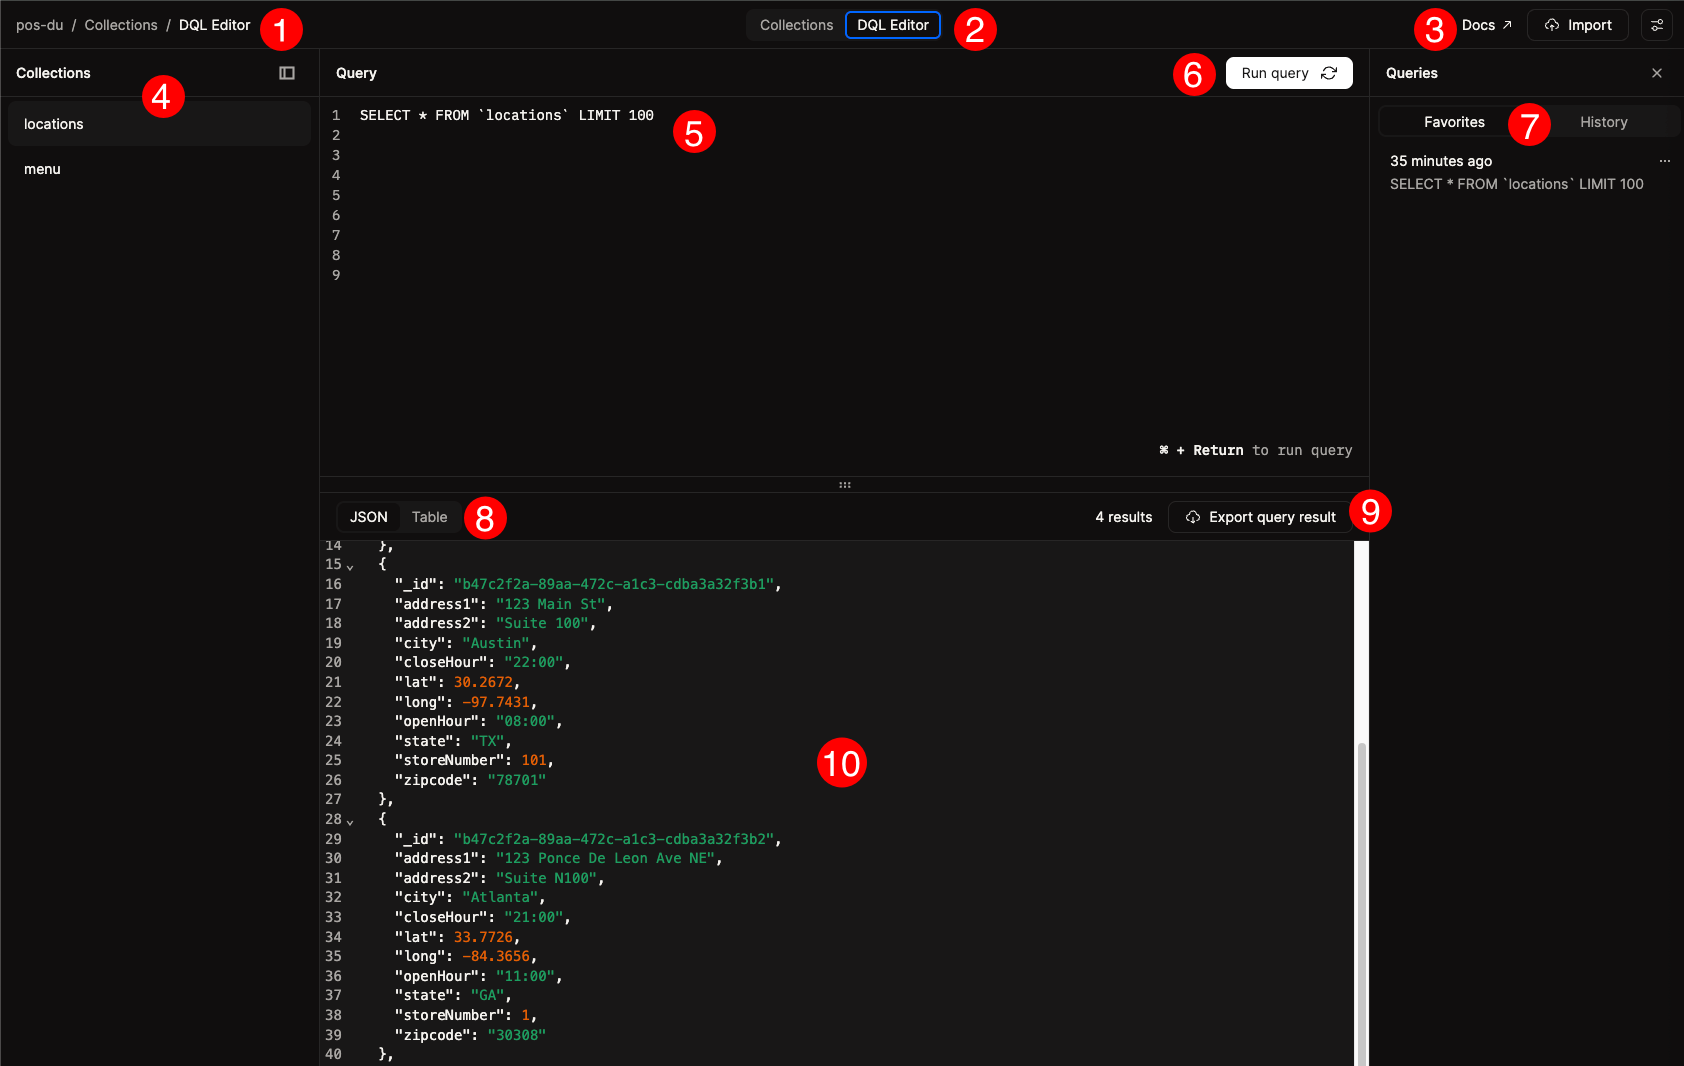
Import
You can use the Import button to import one or more documents as either a file (JSON or CSV) or to import JSON data directly.Import data by file
To import data by file, click the Import button and then select the file you want to import.- You can either select an existing collection to import the data into, or create a new collection to import the data into.
- Use the
Click to upload or drag and droplink to select a file to import. - The file should be in either JSON or CSV format.
- JSON text should follow the RFC 8259 specification.
_id will be displayed in the query results pane as Mutated document ID.
Import data by JSON
To import data by JSON, click the Import button and then select Import by JSON.- You can either select an existing collection to import the data into, or create a new collection to import the data into.
- You will be provided with a text editor where you can enter or paste the JSON data.
_id will be displayed in the query results pane as Mutated document ID.
Settings - Strict Mode
The settings for the DQL Editor are located in the top right corner of the DQL Editor. The settings are used to enable or disableStrict Mode. With strict mode enabled, all fields are treated as a register by default. When enabled, every field in a document must match the collection definition exactly — including its CRDT type (e.g., map, register, counter).
Disabling strict mode enables new functionality: when turned off, collection definitions are no longer required. SELECT queries will return and display all fields by default. This matches the behavior of the legacy query language. - objects in INSERT and UPDATE statements are treated as maps. When a field has multiple possible types, the most recently updated type is chosen.
For new projects, we recommend disabling strict mode. You can learn more about this feature here.
Collections
A list of collections in your database is displayed in the left side pane of the DQL Editor. Selecting a collection will automatically generate a SELECT statement that will be populated in the DQL query editor. You can hide this pane by clicking thedrawer icon in the top right corner of the pane.
DQL Query Editor
The DQL query editor is the main area of the DQL Editor where you can write DQL queries. The editor requires a valid DQL query to be entered. DQL queries need to use single quotes to include field names and values.INSERT statements
An example of a valid DQL INSERT statement in the editor pane to insert a new document into thelocations collection is shown below:
deserialize_json function to convert the JSON string to a DQL string. An example of this is shown below:
UPDATE statements
An example of a valid DQL UPDATE statement is shown below:Mutations to documents via the INSERT, UPDATE, and DELETE statements are displayed in the query results pane as
Mutated document ID.SELECT statements
An example of a valid DQL SELECT statement is shown below:Table button in the top right corner of the query results pane.
For comprehensive DQL syntax and usage information, refer to the DQL documentation.
Queries Favorites and History
The Queries pane is located to the right of the DQL Editor. It is used to view the history of queries that have been executed. You can also add queries to your favorites or delete a query from the history by clicking the... button. You can close the Queries pane by clicking the ‘x’ button in the top right corner of the pane.
Query Results
The query results pane displays the results of the query in either JSON or table format. The number of documents returned by the query is displayed in the top right corner of the query results pane.Exporting query results
Once you execute a query, you can export the results by clicking theExport query result button in the top right corner of the query results pane. You can export the results as a JSON file or a CSV file.
JSON Results
The JSON results display the results of the query in JSON format. A chevron icon appears after each line number allowing you to hide or show elements in the document.Table Results
The table results display all the documents in a table view. Selecting a document in the table will display the document in the Document Viewer.Document Viewer
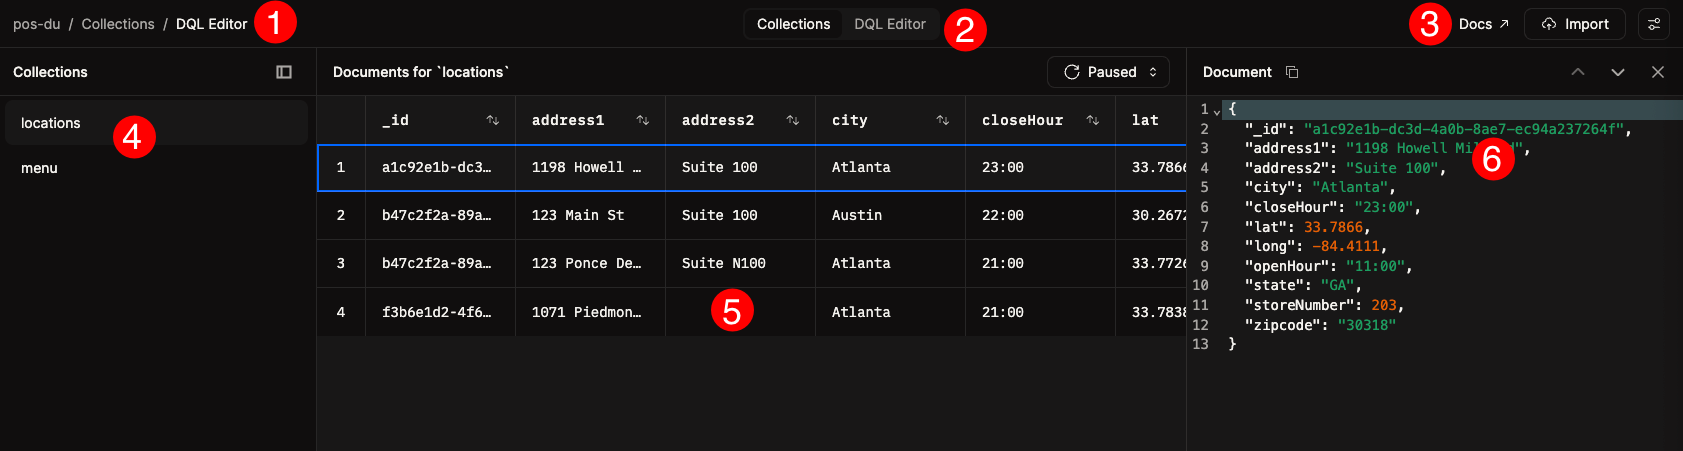
The Document Viewer displays the document in JSON format. You can use the up and down buttons to navigate documents based on how they are displayed in the table view. Clicking the square icon in the Document title bar will copy the document to the clipboard.Collections Data Browser Interface Overview
The following illustration and corresponding table provide a basic overview of the Collections Data Browser: